

Intro
This is still based on Version I - main difference for mounting is the belt clip. It will be delivered mounted to the carriage so you have to remove it and put it onto you belt. Fasten it to your carriage after you mounted the carriage on the rods.
And an important disclaimer - especially if you are not yet expert in in to handle and modify a 3D printer:
- Wichtig: Wir sind nicht verantwortlich for irgendwelche Schäden. Bitte nutzt die Anleitung und die Upgradeteile auf Euer Risiko. Wir verkaufen hier kein fertiges Produkt, sondern die Teile für Euch zusammengestellt und optional zusammengebaut um Euch Aufwand zu ersparen.
- Important: We are not responsible for any damage. Use responsibly and at your own risk. We do not sell a finished product here, but the parts put together for you and optionally assembled to save you effort.
As the Qidi X-Plus, X-Max and I Mate S are regularly suffereing a clogged nozzle/ the extruder gears are no longer able to transport the filament there are several modifications out there to improve this. On top Qidi uses propriatary hardware which could also be replaced by more "standard" one for easy replace and maintenance so becoming more independent from Qidi sourcing. AS such a mod is somehow challenging to source (parts) and Polycarbonate is not the easiest material to print we decided to offer this modification as a prebuild service. So here we go with the manual how to assemble on your individual printer.
The process below takes typically 30min but is highly depending on your experience using 3D printers and changing config using gcode files. Basic knowledge like using a text editor is mandatory.
Tipp for navigation within this page:
- Use the content index on the right side and for links towards subtopics like taking a backup use the browser function "open in new tab or window" (via right mouse button over the respective link) so you can easily jump between this page and the subchapters.
- For translation use the chrome browser translation feature or for Firefox install a translation plugin. This works pretty well.
Parts delivered to you
The assembly consists out of three main parts:
- Carriage (top part) with all main extrusion relevant pieces mounted - details see here
- Fan-Duct for part cooling - you have to temporarirly remove the fan-duct for the mounting process
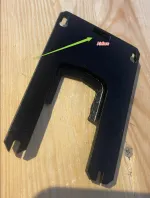
- Belt Clip
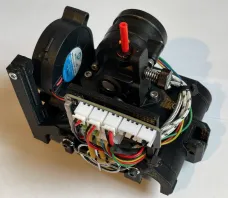
Top Carriage left and Fan-Duct mid & belt-clip right picture
Extras you might get:
- Spare Fan-Duct
- Dialindicator holder
Tools and preparations
Tools needed
- Allen keys
- A flat file to adapt belt clip
- USB SD card (should be included with your printer)
- Notepad ++ or similar editor
- Loctite (optional - if you want to secure your screws)
- Heattransfer paste for high temperature use (optional if you want to improve heattransfer between heatblock and nozzle)
Preparations
Backup of your current printer config: See here for detailed intructions
Next, remove the original QIDI extruder and carriage. To do so (details with pictures here)
- Power down your printer and disconnnect your power cable!
- Remove the screw from the top cover
- Remove the cover
- Unplug the ribbon cable
- Enscrew the extruder from below with the two screws (and possibly fan duct if you have one)
- Lift out the extruder
- Remove two screws holding the belt plate
- Lift over belt then pull off the whole carriage carefully but firmly, it can sit very tight on the bearings
DONE - with preparations and disassembly. Now we build it up again using the mod.
Ikarus Assembly
Mount the carriage
Starting point is a
- clean, powered down Qidi and
- the stock extruder removed.
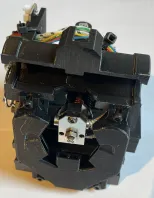
- Fan-Duct removed from the Ikarus mod
So it should looks like:
Now place the mod onto the bearings and ensure that they are in parallel to the carriage and slided into the slot a bit already.

Now press firmly with your thumbs while the other fingers are holding the rods. Means press from bottom and top + right and left at the same time (with both hands). So you should consider Mr. Newtons laws (Kraft und Gegenkraft :)). Temporarily remove the part fan then it is a bit easier. The pictures are showing a non assembled carriage just for better visiblity.
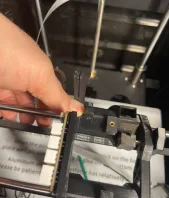
Eample shown on an iMate with 8mm rods
Note: here I used only one hand as the other one hold the camera
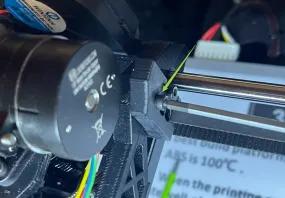
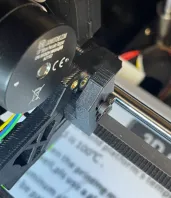
You Have do in in pairs, if not it is very likely that the bearing will be canted. After the carriage should plop/snag into place it looks like:
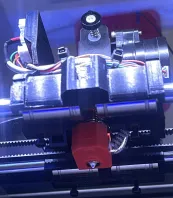
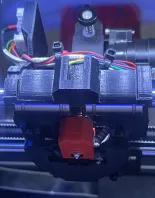
Carriage mounted. Right with Fanduct 1.0

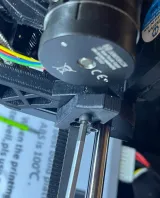
The bearing should sit tight into the housing.
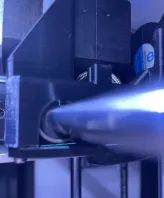
The carriage should slide on the rails like shown here:
Note: my bearings are old and noisy... But also the new bearing
from Qid are very noisy low quality.
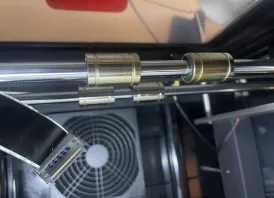
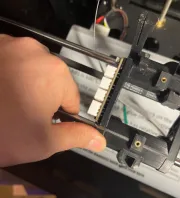
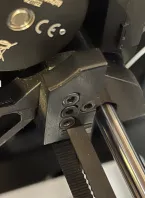
Insert the belt clip
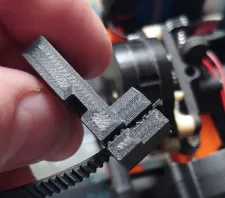
Move the belt holder onto the belt, move it into the carriage and tighten the two screws
Depending on the belt thickness moving the holder and tensioner on the belt can be a bit tricky be patient ![]()
In case you use the optional belt tensioner or you have an open belt (then the tensioner is mandatory)
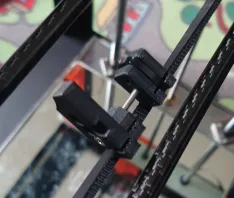

Move the belt holder and the tensioner onto the belt. Distance of both just as far as the screw grabs the heates insert thread of the belt tensioner (see left picture).
Move it into the carriage, ensure the tensioner is upright and add the second long screw (not before). Now you can fasten the top two screws to mount the belt holder onto the carriage as above
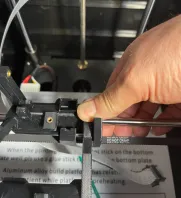
Mount the Fan-Duct
That is fairly simple, just take the for screws and scree it from the bottom onto the carriage. Nothing special to be considered other than that the air flow channel of course needs to sit at the back where the opening in the carriage is.
Important: Check tight fit
At this point please check the bearing fit on tolerances BEFORE you continue. As we got some reports of smaller bearings/not tight enough fit please test the Carriage and ensure that you can not move it up&down like shown in this video:
That the bearings can be rolled a bit is OK but the carriage should not be able to move up and down.
If this happens a smaller version will be provided - please contact us.
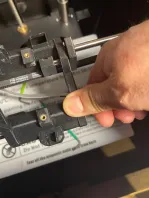
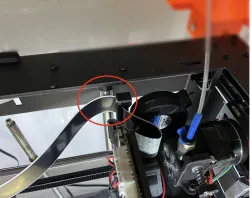
Insert Ribbon cable
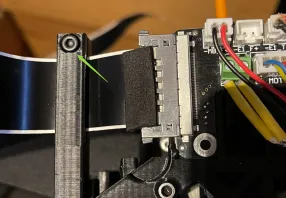
Inserted ribbon cable and tighten the screw
this step is a bit cumbersome/tricky to manage the cable through the holder into the connector. Please stay patient don't become agressive maybe some deep breath helps ![]() and try it again - it can be done... I know you can make it - as even I did it. Don't bend the cable too much!
and try it again - it can be done... I know you can make it - as even I did it. Don't bend the cable too much!
Firmware/config changes
Note: config settings for Orbiter 1.5 are also applicable for Orbiter 2.x
For the following steps the printer needs to be powered on again - this assumes all steps above where succesful! Of not or questions please consult me via the conversation button in the right top corner of this forum:

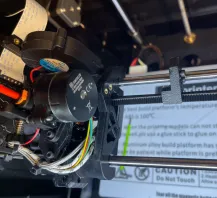
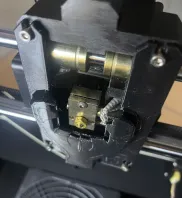
Please check if the temperatur of the heatblock is reported correctly
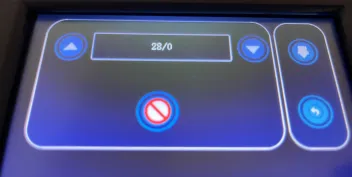
Note: the picture shows Celsius, typically the sensor is reporting ~5C more than real. But this does not matter for 3D printing that much as you anyway need to dial in your target temp based on a heat tower per material your print. In case it shows 1077C the connectors are not sitting properly - please check cabling.
Please take care of your Extruder Gear/Stepper degree setup and adapt the e-steps acordingly - see also Extruder Kalibration Defaulvalues. Below sources already contains the Orbiter ones. Note that the eSteps mit be rounded by the firmware wenn saving, so in case you check a config dump later take care of the rounding effect in case you do not find exactly the same value.
M8011 S0.001571;e每步mm
Is saved on my printer after setting 0.001570796 as value.
X-Max Specific
Use this only on X-Max (X-Plus is below)
M8002 I1;X motor direction
M8005 I1;Stepper motor direction
M8011 S0.001570796;E-steps
M8020 S0;Disable firmware retraction - FW version depeding
M8024 I290;X Maximum stroke
M8025 I240;Y Maximum stroke
M8026 I290;bed height change
; M8007 I5; Jerk
; M8008 I600; Acceleration X/Y
; M8022 I400; (use at own risk, increase max print temp)
M8500;Save changesicarus-orbiter-1.5-xmax-fw_config.gcode.zip
Put the code into a .gcode file on your USB drive and print the gcode file (as for the backup command above). The procedure is the same as for the backup. You can doublecheck if the values are correctly stored as setting if you take another config backup (please choose a different filename as before) and search for the M codes (like M8026) you should see exactly the values given above. If not stop the procedure and recheck the config change / contact me.
Note: The maximum stroke values are for security reasons 1cm smaller than they could be. You can adapt later to increase build volume again. E.g.
but be careful with this.
X-Plus & I-Mate Specific
Use this only on the X-Plus or I-Mate (X-Max is above)
M8002 I1;X motor direction
M8005 I1;Stepper motor direction
M8011 S0.001570796;E-steps
M8020 S0; Disable firmware retraction - FW version depeding
M8024 I260;X Maximum stroke
M8025 I190;Y Maximum stroke
M8026 I190;bed height change
; M8007 I5; Jerk
; M8008 I600; Acceleration X/Y
; M8022 I400; (use at own risk, increase maximum print temp)
M8500;Save changesicarus-orbiter-1.5-xplus-imate-fw_config.gcode.zip
Put the code into a .gcode file place on your USB drive and print the gcode file (as for the backup command above).
The procedure is the same as for the backup. You can doublecheck if the values are correctly stored as setting if you take another config backup (please choose a different filename as before) and search for the M codes (like M8026) you should see exactly the values given above. If not stop the procedure and recheck the config change / contact me.
Note: The maximum stroke values are for security reasons 1cm smaller than they could be. You can adapt later to increase build volume again. Eg.
But be careful with this. The Z (bed) value will be corrected doing the first bed leveling. Be careful there as well. Best have your hand on the powerbutton when you do first movements being prepared for emergency stops.
Jerk and Acceleration explained
See http://customize-3d.com/chitu-g-code-explained.html
;JERK
;
;maximum speed while turning a corner. There there will be a large number of reciprocating motion while filling.
;The noise is loud while this value is large. When the value is small, the speed is slow
M8007 I15
;ACCLELERATION
;
;acceleration, the larger the value is, the greater the actual average moving speed is.
;However, the noise is loud. The actual speed is small when the value is small
M8008 I1000
You can play with those values to optimize speed contra quality and noise - but do it carefully.
Movement check
Move your extruder manual and slowly to the middle like:
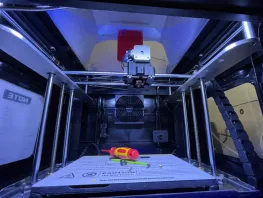
If you now move the tool head via tools on the touchscreen it should look like:
In case the extruder moves to the right even if you pressed the left button the direction setting above did not work. Please check again if you executed the steps correctly.
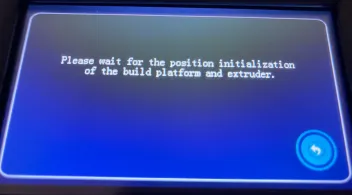
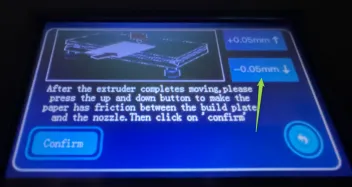
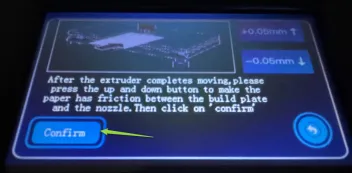
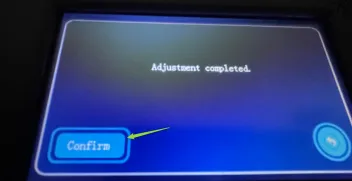
Now do a standard fast leveling - to calibrate the Z-Height.
Hold your finger on the poweroff button and be ready to power down in case the nozzle moves into the bed. This should not happen except you forgot to move down the bed as described above.
Note: Depending on firmware your Qidi might not offer Fast leveling (e.g. iMate) in this case use the standard leveing procedure but ignore the first leveling for the bed (distance will be too far) just use the mid leveling to setup the nozzle bed distance - you have to press the up button pretty often.

Bed Leveling positions
Since the Extruder has a different dimension the nozzle position might be no longer on the right spot above the bed where you would like them to be. This is depending on your print sheet. To adjust the position please follow the instruction in "Bed Leveling settings - How to move bedleveling spot to different locations". It is just four lines of gcode with new positions that needs to be sent to the printer.
First usage & temp
Before you start to print anything please doublecheck if both fans are running properly - the HB Fan should start running as soon as the Nozzle reaches 50C and the Partfan you can test via the Menu/Tool/Fans on your Qidi (Or via Octoprint).
As I typically test the function using cleaning filament (transparent eSun), please ensure that the nozzle temp for first loading of filament is >=160C until your chosen filament is extruded for some cm and the cleaning filament is fully removed. Maximum temp. for first extrusion should not exceed 300C.
In case of any smoke or smell like burned plastic turn off the heater immediately. (FR will not burn but of cause can be melted if it will be too hot).
Tuning and optimizations
As further steps you should do some further calibrations like:
- PID Tuning - tunes the algorithm to heat up your nozzle and to keep nozzle temp stable - as we replaced heater and fans this should really be done!
- Build Volume optimization - above we reduce the max volume, here how to increase it again
- Extruder Calibration - Howo to calibrate the amount of filament flowing out per stepper rotation.
Spareparts/Ersatzteile
I have them typically also on stock - so if not in the shop yet you might ask. At least shipping within Germany should be much faster as from China.
Here for Trianglelabs:
- TL Dragon Heatbreak
- TL Dragon Heatsink
- TL Dragon Heatblock
- TL Plated Copper Nozzles
- TL Plated Copper Ruby Nozzle
- TL Standard Nozzles
- TL Hardend Steel Nozzles
- TL Dragon Screw Set
- TL Dragon Adapter
- TL Heatelement 50W
- TL Dragon complete (no longer available)
- TL Orbiter Extruder
- Thermocoupler
For Phaetus sparsparts please check google or their reseller website - I might also put some spareparts into the shop here later this year.
Fans:
- Winsin Part Fan 50mm (Hydraulic Bearing)
- Winsin Part Fan 50mm (Double BallBearing)
- TL Part Fan 50mm (wenn mir jemand einen aktuellen Link hat füge ich den gerne wieder ein)
- Winsin 40x40x10 HB Fan
- Sunon 40x40x10 HB Fan
- TL 40x40x10 HB Fan
Dialindicators:
Further important notes
- Just to repeat: In case of any smoke or smell like burned plastic turn off the heater immediately. (FR will not burn but of cause can be melted if it will be too hot). Don't let the printer unattended when running - especially after changes (e.g this mod). Do several testprint while monitoring the printer. Always recommended: install a smoke detector!
- The nozzle might rattled lose while transport - so please retighten it with 1.8Nm torque - ideally when warm
- Check all screws if still tight - you might secure them with Loctite if you want, otherwise add the check to your maintenance procedure of your printer (anyway needed)
- In case you want to clean the nozzle with a brush please ensure that you do not not shorten the heat element. According to support group experience this will destroy the mainboard. Heat up the nozzle switch off printer and only after display is off as well start the cleaning process.
(Falls Sie die Düse mit einer Bürste reinigen möchten, achten Sie bitte darauf, dass Sie das Heizelement nicht kurzschließen. Nach den Erfahrungen der Support-Gruppe kann dadurch das Mainboard zerstört werden. Erhitzen Sie die Düse des Druckers, schalten Sie den Drucker aus und erst nach ausgeschaltetem Display starten Sie den Reinigungsvorgang.) - Heatblock/Nozzle heat transition: you can improve heattransition between heatblock and nozzle if you put a bit of thermal paste on the nozzle thread. Be careful with this in case you are going up to high temp like >280C as not all thermal pastes are able to handle those temps. You might bake nozzle and heatblock together. Note: Per default Qidi does not allow temps >300C.
- DialIndicator-holder: sometimes a just put some holders for free into the boxes - those are not sanded yet - to fit them in you need to sand and drill until it fits to your holder and carriage.
- Filament change: If possible don't use the Qidi change procedure which tries to push forward the filament speedily and then ejects the filament. This creates unneded stress on the drive and does not work very well with Dragon hotends. Instead just let the filament run through the drive added your new filament on top so that it smoothly replaces the old one. Let it run until the filament extruded is the new one only.
- Printing very high temp without cooling: If you print >=250C several hours without sufficient airflow via partfan the FanDuct should be removed to avoid deformation due to overheating of material.
- Retract: set retract to a low value to start (evtl. <<1mm) values as used by the original Qidi extruder will lead to flow issues (esepcially TPU but as well PLA)
- iMate Specific:
You might need to add a distance plate as described here: https://www.elektrifiziert.net/blog/index.php…cc-preparations to avoid to much bending on the cable. Using the distance plate you might reduce you Y-Volume.
In case still some questions maybe the video of humebeam helps as well (he covers the complete installation process from scratch:
ab min 6:50 die Montage
Kommentare 6
Neu erstellte Kommentare unterliegen der Moderation und werden erst sichtbar, wenn sie durch einen Moderator geprüft und freigeschaltet wurden.
Neu erstellte Kommentare unterliegen der Moderation und werden erst sichtbar, wenn sie durch einen Moderator geprüft und freigeschaltet wurden.